How to set up iOS Push Notifications: a detailed guide
What are the main types of iOS Push Notifications? How do you implement them correctly? How do you send a notification so that the user doesn't see it? iOS developer Nadzeya Savitskaya provides specific examples and shares code.

Read other expert’s articles:
— We all encounter pushes every day. We see so many of them that we get tired of them and forbid applications to send them. But despite the fact that developers cannot guarantee 100% delivery of notifications to users, pushes still remain one of the main tools for consumer engagement.
Local Push Notifications
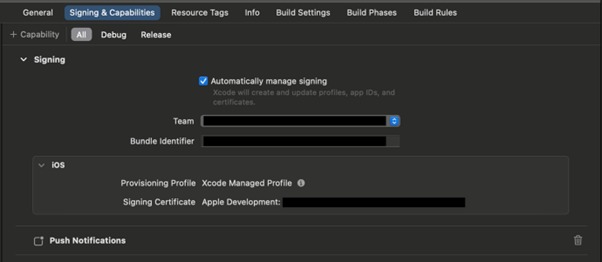
— Let's start with the simplest option. As a developer, I have nothing but Xcode and a paid developer account. I'm developing my application alone, without a back-end and without using any third-party services. Yes, you heard right: in order to use push notifications, you need to have a paid developer account. With this setup, I will be able to send users only Local Push Notifications. How it looks to the developer: in Xcode, there is a new capability — Push Notifications was added to the Signing & Capabilities tab.
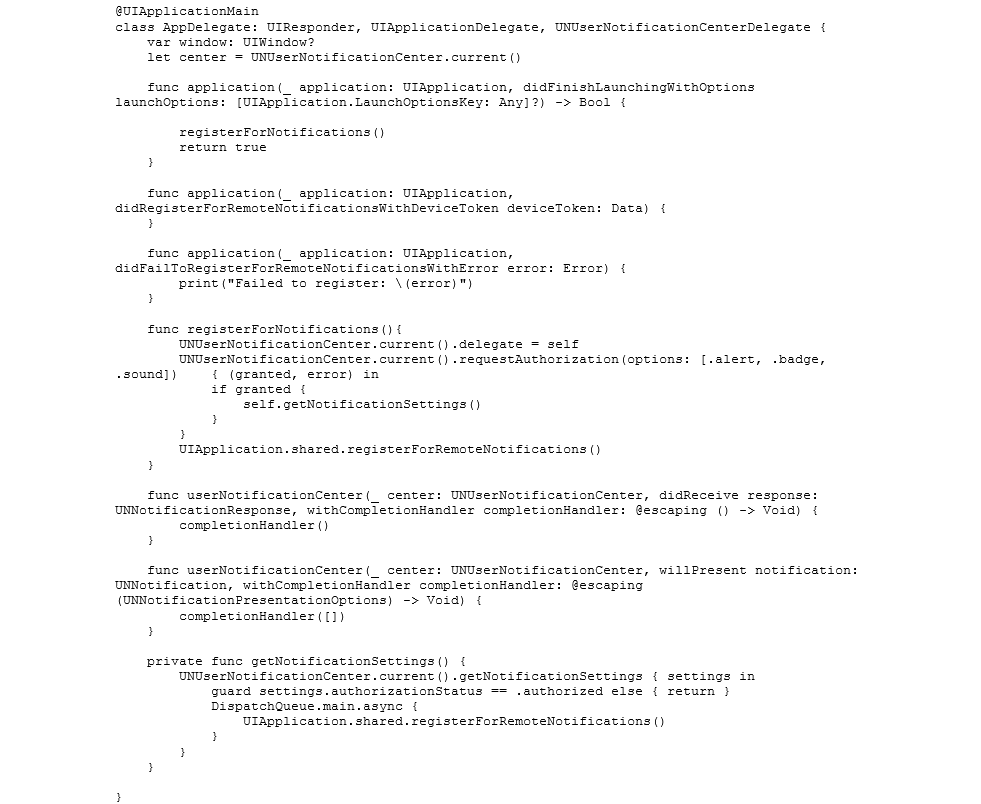
We can write code to request permission to send notifications to the user. When permission is granted, we will register the device token in APNs — Apple Push Notifications Service. This token is the address of a specific device that can be used to send notifications to a specific user.
The user can prohibit the sending of notifications at any time. The developer does not need to react to this in any way or write anything else in the code. The device token remains active in case the user changes their mind and turns on sending notifications again.
To send Local Push Notifications, you need to write a few more lines of code. You can create a schedule with any number of notifications, with each sent according to the timetable you chose. For example, it can be a scheme of 5 notifications, where the first notification is sent a day after the last user session; the second after three days; then the next after five, seven, and ten days, or whatever frequency you select.
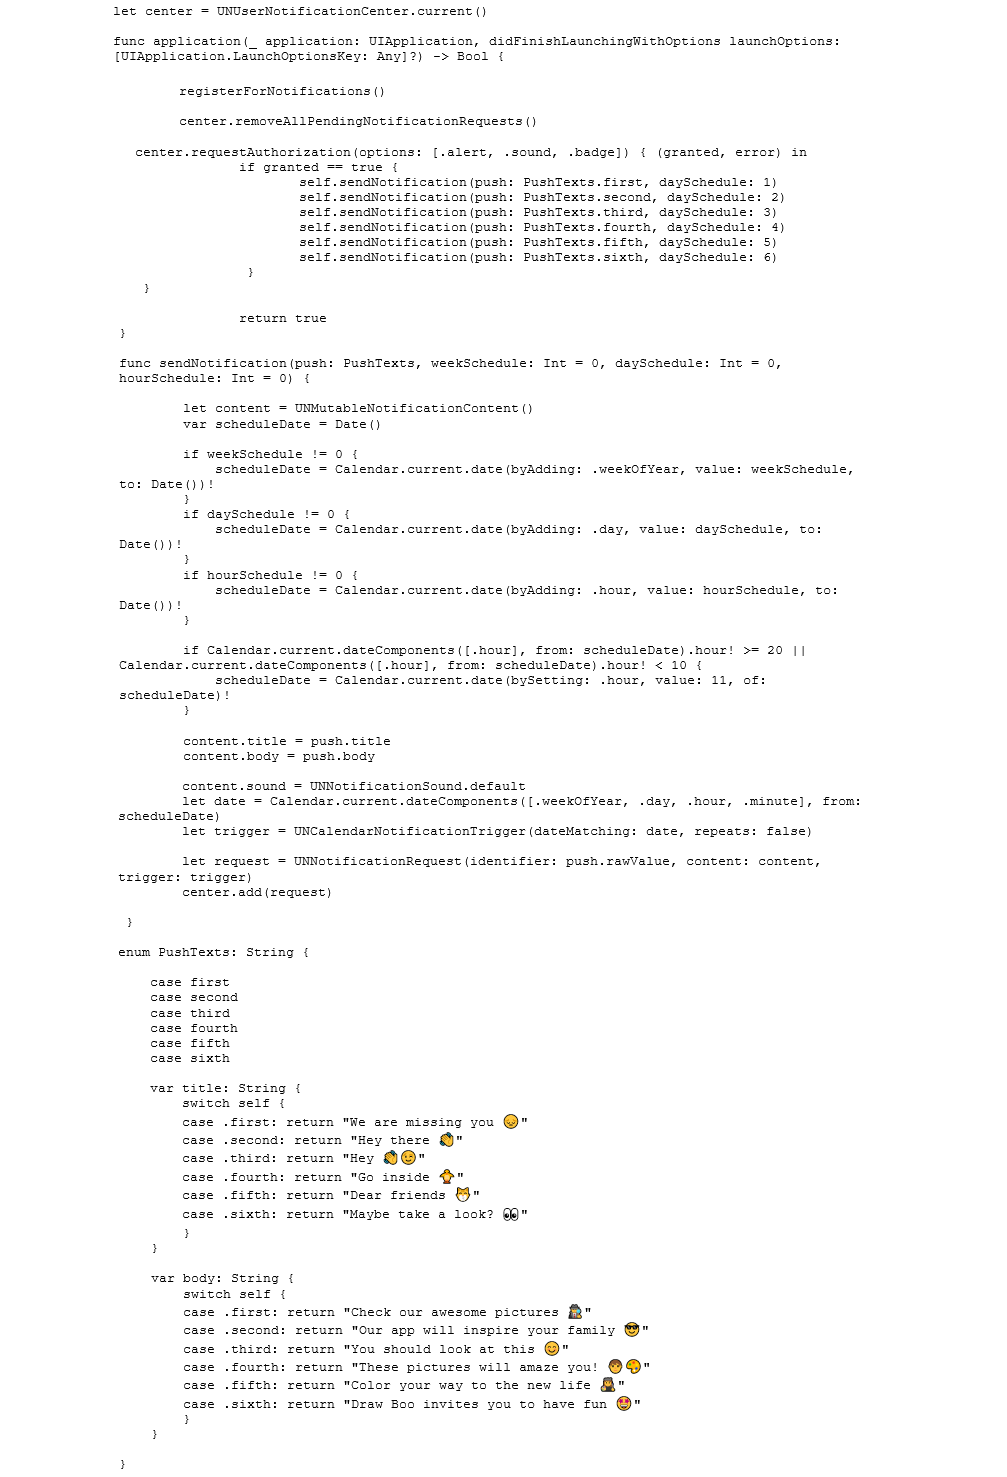
The disadvantage of Local Push Notifications is that they cannot be changed in any way after the release of the application. For any changes in the texts or schedule, you will need to reassemble the assembly and go through the review again.
Remote Push Notifications
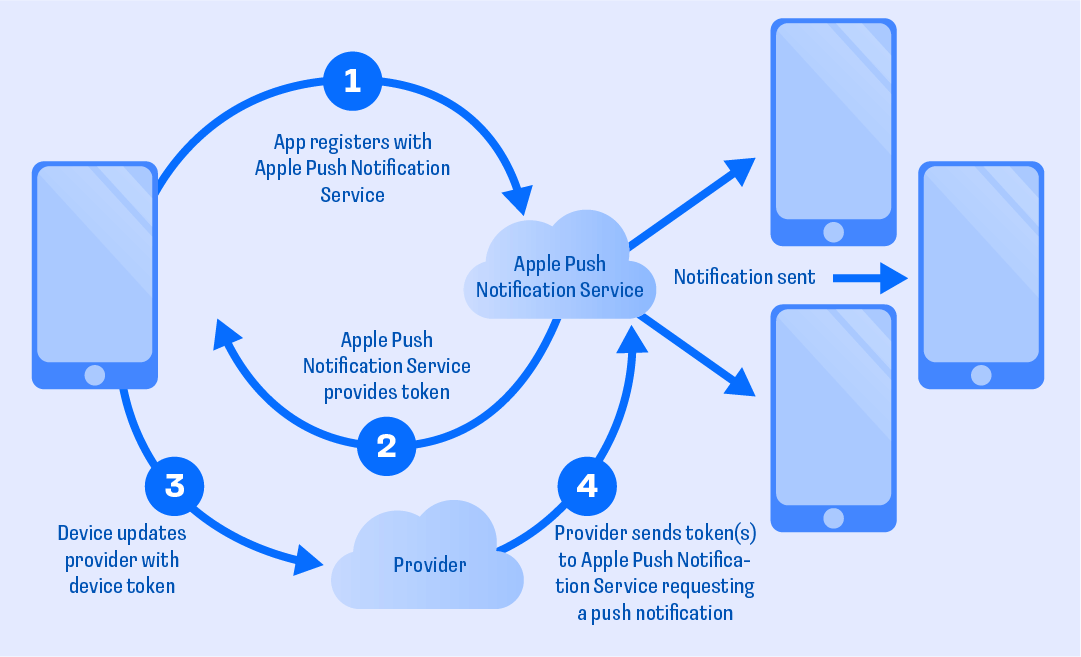
— If we add a provider to our setup from Local Push Notifications, it will be possible to send notifications to users more flexibly. The provider consists of both the server part of the application and any of the third-party services, such as Firebase, Amazon Simple Notification Service, Braze, Kulumos, Onesignal, or Airship. We can use both Local Push Notifications and Remote Push Notifications in one application.
To configure any of the services mentioned above, the developer needs to use their personal account at developer.apple.com to download the.p8 key file and then upload in the provider's personal account, for example, Firebase. The process of integrating any of the services into your application is best described in the documentation on the official websites for the services. If a service has been configured, and the test notification that was sent does not reach the desired device, you can use an application to check Remote Push Notifications — for example, onmyway133.com. This will help you understand which side the error is on: the integration of the service or the notification settings.
Remote Notification Payload
— At its core, a notification is information that is written in a certain way, and called payload. This information can be edited by adding or removing some fields, thereby changing the appearance and functions of notifications. Let's look at some examples.
The simplest notification contains Title and Body:

In place of plain text, localization keys can be sent so that the text in the desired language is displayed to the user:

You can add a field to add a badge with the desired number on it:

You can use a different sound for various notifications:

And transmit custom information:

Silent Push Notifications
— Often, for a client-server application, developers want to update certain information when the user's application is in the background (collapsed). Silent Push Notifications are suitable for this. Users will not see silent notifications when they are sent, but the application will be able to understand that some action needs to be done, for example, to update information from the server.
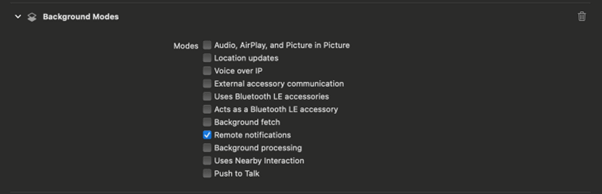
To implement these notifications in Xcode, another capability — Background Modes — was added to the Signing & Capabilities tab. The Remote notifications item is selected in it.
In the notification payload, you must add the "content-available" field with a value of 1 or true.

Now, the developer just has to catch the notification. In the didReceiveRemoteNotification method, you need to check for Silent Push Notification and call the required update method.

A Silent Push Notification will not be sent to the device if:
- The application has been unloaded from memory, meaning it is not in background mode.
- The "Low Data Mode" mode is enabled on the device.
Other Push Notifications
— In addition to the notifications discussed above, there are also the following types of notifications:
- Provisional Push Notifications — the user will not receive a request for permission to send notifications to them. And notifications that are sent will be displayed without sound and only in the Notification Center.
- Critical Alert Push Notification — such a notification will come to the user with a sound, even if the "Do Not Disturb" mode is enabled. You will need a special permission from Apple to use this option because it is intended for special circumstances only.
— My goal for this piece was to tell you about the main types of iOS Push Notifications. I hope that the article was useful.
To share your expertise on the Anywhere Club blog, fill out the Become a hero of club form.