Complete guide to creating Android apps with Kotlin
The author of this article is tech expert Pieter Murphy.

Introduction
Diving into the world of Android app development can be both exciting and rewarding, especially with the power of Kotlin at your fingertips. Whether you're a seasoned developer or just starting out, creating Android apps with Kotlin opens the door to a world of modern, efficient, and expressive coding.
By mastering Kotlin, you can streamline your development process and unlock advanced Android Kotlin development techniques that make building apps a breeze, turning your ideas into fully functioning applications.
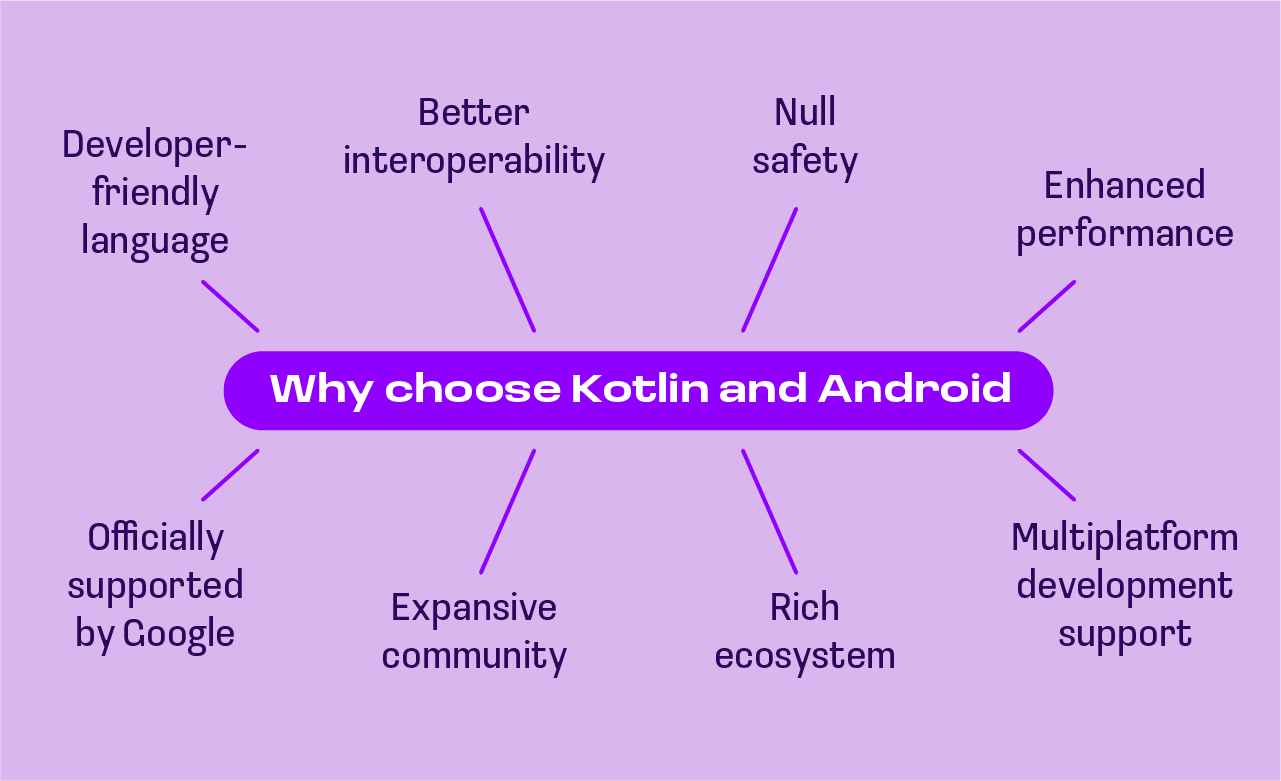
Why choose Kotlin and Android
Developer-friendly language
Kotlin was designed with developers in mind, offering a modern, concise syntax that significantly reduces boilerplate code compared to Java. This simplicity allows developers to focus more on solving problems rather than wrestling with verbose code. Its intuitive structure makes it easier for newcomers to pick up quickly while still being robust enough for experienced developers.
Creating Android apps with Kotlin means you’re working with a language that prioritizes readability and productivity, helping you write cleaner code with fewer errors. This developer-friendly environment speeds up the development process and makes maintaining apps much more manageable.
Better interoperability
One of Kotlin's most powerful features is its seamless interoperability with Java. For those transitioning from Java or working on projects that involve a combination of both languages, Kotlin integrates smoothly. You can call Java code from Kotlin and vice versa without any complications. This flexibility allows developers to migrate existing projects gradually without the need for a complete rewrite. Advanced Android Kotlin development projects benefit from this feature, as developers can continue using valuable Java libraries and frameworks while building new features in Kotlin, making the transition to Kotlin more approachable and less risky.
Null safety
Kotlin’s null safety feature stands out as a significant advantage over other languages. NullPointerExceptions (NPEs) are one of the most common causes of crashes in Android apps, but Kotlin eliminates much of this risk with built-in null safety checks.
In Android Kotlin, variables are non-nullable by default, meaning developers must explicitly declare if a variable can hold a null value. This reduces runtime crashes caused by null references and makes the code much safer and more predictable. For Android developers, this adds a layer of reliability that improves app stability and overall user experience.
Enhanced performance
Kotlin offers enhanced performance in Android development thanks to its lightweight nature and optimization features. The language compiles to efficient bytecode, making it run as fast as Java while also reducing app size. When you learn Android Kotlin, its functional programming capabilities allow developers to write highly efficient code that handles tasks more smoothly, improving both speed and resource usage.
As a result, apps built using Kotlin often perform better, offering faster load times and better memory management. For developers focusing on creating high-performance applications, Kotlin ensures that apps are not only faster but also more responsive across various devices.
Officially supported by Google
Kotlin became the preferred language for Android development when Google officially endorsed it in 2017. This support has accelerated the adoption of Kotlin, offering developers a reliable and evolving platform with constant updates from both Google and JetBrains.
For anyone starting out with Android development, Google provides extensive resources, documentation, and even an Android Kotlin beginner tutorial to help developers get up to speed. With this official backing, developers can be confident that Kotlin is here to stay, making it a future-proof choice for Android app development.
Expansive community
One of the most significant advantages of Kotlin is its active and growing community. Beyond Google’s official support, developers worldwide contribute to an ever-expanding pool of knowledge, tutorials, libraries, and tools. Whether you're a newcomer or an experienced developer, you can easily find support and share solutions with other Kotlin enthusiasts. Beyond the success of Kotlin, this community ensures continuous learning and collaboration, helping developers solve complex challenges more efficiently and confidently build high-quality apps.
Multiplatform development support
Kotlin isn’t limited to Android; it supports multiplatform development, allowing developers to use the same codebase for different platforms like iOS, desktop, and web. This flexibility reduces the time and effort needed to develop and maintain apps across multiple operating systems, making Kotlin a highly versatile tool.
By using Kotlin Multiplatform, developers can create Android apps alongside apps for other platforms while still maintaining consistent functionality and code quality. This cross-platform capability adds a layer of convenience and efficiency for teams working on complex projects.
Rich ecosystem
Kotlin offers a rich ecosystem filled with powerful libraries, frameworks, and tools designed to simplify Android app development. Developers can easily tap into existing solutions for everything from networking and UI building to testing and database management.
Thanks to Kotlin’s strong interoperability with Java, developers have access to Java-based tools alongside Kotlin-specific ones. The availability of modern Kotlin-based frameworks and Google’s continuous investment in expanding Android Jetpack libraries further enriches the ecosystem, enabling developers to build high-performance, feature-rich applications quickly and efficiently.

Read about learning Kotlin for Java developers in our article.
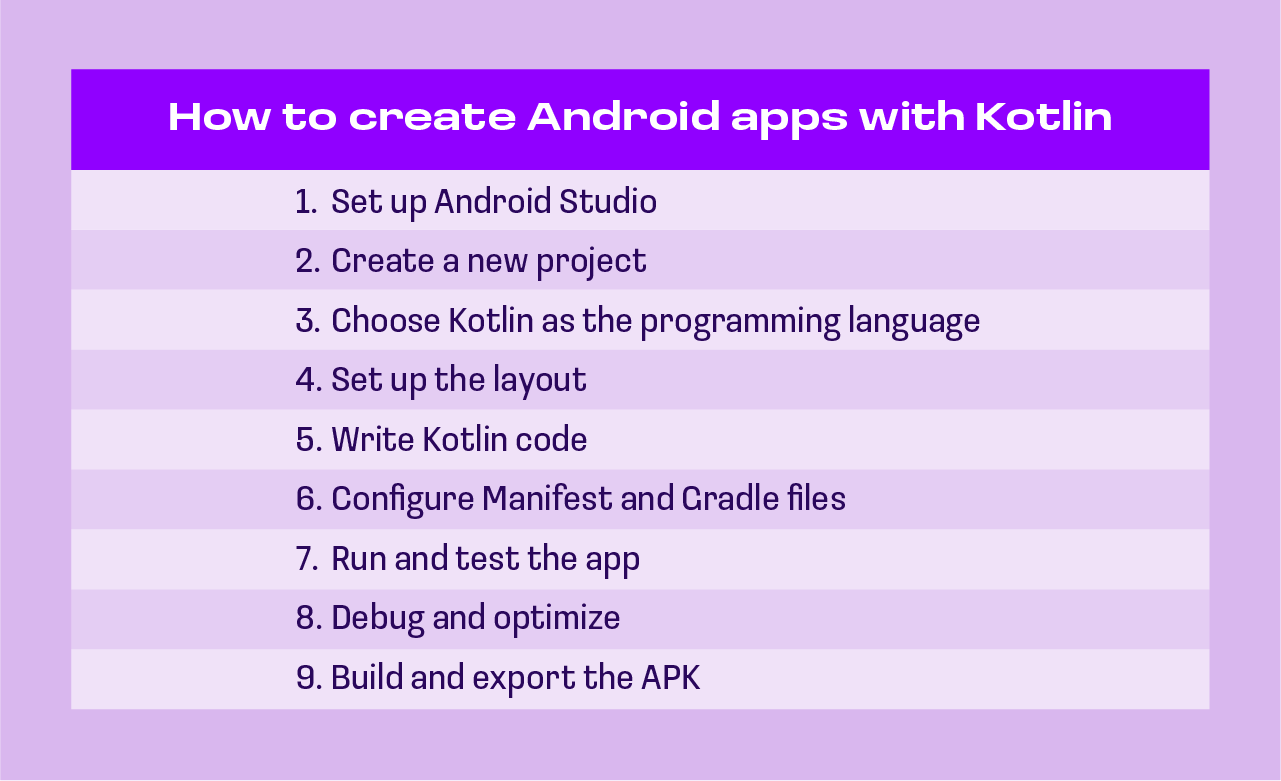
How to create Android apps with Kotlin
Step 1: set up Android Studio
The first step in this Android Kotlin app tutorial is to download and set up Android Studio, which is the official IDE for Android development. Android Studio comes with built-in support for Kotlin, so you won’t need any additional tools or plugins to start coding. Once you download it from the official Android website, follow the installation instructions, which will guide you through the setup process. Be sure to configure the IDE settings according to your system’s capabilities for the best performance.
Android Studio not only serves as a powerful coding environment but also provides tools for debugging, performance profiling, and testing your applications. This all-in-one solution is designed to streamline your development process. Whether you’re an experienced developer or a beginner, using Android Studio allows you to take full advantage of Kotlin’s features while accessing essential tools to optimize your app's functionality. Android Kotlin training materials often focus on mastering this IDE because of its central role in the development process.
Step 2: create a new project
Once Android Studio is installed, the next step is to create a new project. Open Android Studio and click on "Start a new Android Studio project." This will bring up a setup wizard that helps you configure your project by defining key elements like the project name, package name, and where the project will be saved. You will also select the minimum SDK, which defines the lowest Android version your app will support. Make sure to choose the appropriate settings depending on your target devices.
At this stage, Android Studio will generate a basic project structure, including default files and folders. These will include essential elements like the AndroidManifest.xml and resource folders, where you’ll manage the app’s layout and assets. As you get more comfortable with advanced Android Kotlin development, you'll have the flexibility to customize this project setup to suit your needs. But for beginners, the wizard’s default options will set a solid foundation for your app.
Step 3: choose Kotlin as the programming language
After setting up your project, you'll need to select Kotlin as your primary programming language. When you create a new project, Android Studio provides an option to choose between Java and Kotlin—simply select Kotlin. This choice ensures that your project is pre-configured to support Kotlin syntax, making it easier to start coding immediately. The IDE will then automatically generate Kotlin-based activity files, allowing you to dive into coding without any extra setup.
Choosing Kotlin not only gives you access to modern language features but also simplifies your coding process thanks to its concise syntax and powerful tools. Kotlin’s interoperability with Java means you can still use Java libraries or even gradually migrate a Java-based project to Kotlin. As you get more familiar with the language, you’ll appreciate how Kotlin enhances productivity and reduces boilerplate code. Many advanced Kotlin development projects capitalize on these features to build more efficient, scalable applications.
Step 4: set up the layout
Now that you’ve chosen Kotlin as your programming language, it’s time to set up your app’s layout. Android Studio offers a visual layout editor that makes designing your app’s user interface straightforward. You can drag and drop UI elements like buttons, text fields, and images onto the design canvas or directly edit the XML layout files. The visual editor provides real-time previews so you can see how your app will look on different devices as you make changes.
For more complex layouts or responsive designs, editing the XML directly gives you precise control over every aspect of the UI. Android Studio’s layout tools are flexible enough to accommodate both beginners and experienced developers, allowing for both simple and advanced designs. After setting up the layout, you’ll connect the UI elements to your Kotlin code to handle user interactions. This step is crucial for ensuring that your app functions as intended and offers a seamless user experience, a skill most Android Kotlin training programs emphasize.
Step 5: write Kotlin code
With your layout ready, the next step is to write Kotlin code that defines the functionality of your app. Kotlin is highly expressive and allows you to write clear, concise code for handling user interactions, connecting to databases, or displaying dynamic content. Start by writing basic functions to respond to button clicks, capture user input, or navigate between screens. Android Studio offers features like code completion, making it easier to develop robust applications quickly.
In addition to writing core app functions, Kotlin also supports more advanced features like coroutines, which allow for smooth asynchronous programming. Developers can take advantage of the AI-assisted tools for Kotlin developers in Android Studio, which can suggest optimized solutions and even help generate code snippets. This makes it easier for developers of all skill levels to implement complex functionalities while keeping their code clean and efficient.
Step 6: configure Manifest and Gradle files
The AndroidManifest.xml file and the Gradle build files are essential to your app's operation. The Manifest file defines critical aspects like app permissions, activities, and services, while the Gradle files handle project dependencies and build configurations. Properly configuring these files ensures that your app runs smoothly and has access to necessary libraries or APIs. For example, if your app needs internet access, you’ll declare that permission in the Manifest file.
Configuring Gradle can sometimes be challenging, especially when adding external libraries or setting up specific build variants. However, Gradle’s flexibility allows you to manage dependencies efficiently, ensuring your project has everything it needs to function correctly. Adding the right configurations at this stage is critical for a smooth build process, especially as your project grows in complexity or if you're working with features like the Android Kotlin application class to manage global app states and settings.
Step 7: run and test the app
Once you’ve written your Kotlin code and configured the necessary files, it’s time to run and test your app. Android Studio allows you to test your app on various devices using either a built-in emulator or a physical device. Running the app helps you check if the UI looks correct and whether the basic features work as expected. Testing at this stage is crucial for catching early bugs or performance issues before moving forward with further development.
Beyond simple manual testing, Android Studio provides automated testing tools that help ensure your app functions correctly across different scenarios. You can write unit tests for individual components or instrumented tests that check your app’s behavior on actual devices. This helps identify potential crashes or glitches that might affect the user experience. Testing early and often keeps your app on track for a successful release.
Step 8: debug and optimize
Some issues will inevitably arise when developing your app, making debugging a crucial step. Android Studio has advanced debugging tools that help you track down problems in your Kotlin code. Whether it's a crash caused by incorrect logic or a performance bottleneck, these tools provide detailed logs and insights to identify the root cause. You can set breakpoints, inspect variables, and even step through your code line by line to see exactly where things go wrong.
Beyond debugging, optimizing your app is equally important. This could involve improving memory usage, reducing the app’s size, or optimizing its performance. Using the Android Profiler, you can monitor your app’s CPU, memory, and network usage in real time. This helps you fine-tune the performance to ensure your app runs smoothly across a wide range of devices. For more complex apps, leveraging AI can further streamline the debugging and optimization process, offering intelligent insights and performance suggestions.
Step 9: build and export the APK
After your app is debugged and fully functional, the final step is to build and export the APK, which is the file format used to distribute and install Android apps. Android Studio makes it easy to compile your project into an APK or bundle that you can upload to the Google Play Store. Before doing this, ensure you sign your app with a release key and configure any necessary ProGuard rules to minimize the app’s size and improve security.
Building the APK is a straightforward process that combines all your app's resources, code, and assets into a single file. Once generated, you can distribute it directly to users or submit it to the Play Store for review. Whether you’re launching a simple app or one with complex functionality, exporting the APK is the final step in transforming your project from concept to reality. Having a polished APK ready means your Android Kotlin application class is now complete and ready for real-world use.

How can we help you with developing Android apps with Kotlin?
At Anywhere Club, we are passionate about empowering developers with the tools and knowledge they need to succeed, which is why we’re proud to showcase a course on AI-Assisted Engineering for Kotlin Developers. This course is designed to help Kotlin developers enhance their productivity by using AI tools like ChatGPT. The course covers everything from understanding GPT architecture to practical applications that streamline development tasks. Whether you're writing, testing, or debugging Kotlin code, our course shows you how to effectively integrate ChatGPT to accelerate your workflow, optimize performance, and improve code quality.
Through this hands-on course, you’ll explore advanced techniques like framework selection, API integration, and performance tuning, all while leveraging the power of AI. We guide you through best practices, ensuring you’re not just automating tasks but enhancing your overall development process. You’ll also learn how to use ChatGPT for continuous integration, automated testing, and even infrastructure management. Join us at Anywhere Club and take your Kotlin development to the next level with this game-changing tool.
Conclusion
Mastering Kotlin for Android development offers a wide range of benefits, from improved productivity to enhanced app performance. By following the essential steps like setting up Android Studio, writing Kotlin code, configuring key files, and testing your app, you'll be well on your way to creating efficient and user-friendly Android apps. For those looking to take their skills even further, pursuing an Android Kotlin certification can validate your expertise and open doors to new career opportunities in Android development.
FAQ
Is Kotlin good for Android app development?
Yes, Kotlin is excellent for Android app development. It's officially supported by Google and offers modern features, concise syntax, and full interoperability with Java, making development faster and more efficient.
Is Kotlin alone enough for Android development?
Yes, Kotlin is sufficient for Android development. While additional tools and frameworks can enhance your app, Kotlin provides all the necessary functionality to create full-featured Android applications.
Is Kotlin easier than Python?
Kotlin and Python serve different purposes, so ease depends on context. Kotlin is more structured and optimized for Android development, while Python is more flexible and beginner-friendly, especially for general programming.


.png)
